With AForms’ extension software “AFormsPdf”, you can automatically publish quotations in PDF format that your customers create in forms.
In this article we will explain how to customize the sample included with AFormsPdf and create a PDF quotation quickly.
How AFormsPdf works
In AFormsPdf, the site owner creates “PDF templates”.
This PDF template stores the layout and the content of the PDF quotation.
In addition, the timing at which the customer downloads the PDF file is also recorded.
Once you have created a PDF template, you can apply it to your form. Then your customers will be able to automatically publish PDF files from that form.
Step 1: Choose a sample of your favorite
Once the General Pack of AFormsPdf is installed, 5 sample PDF templates will be registered.
First, please choose your favorite one from these 5 samples.
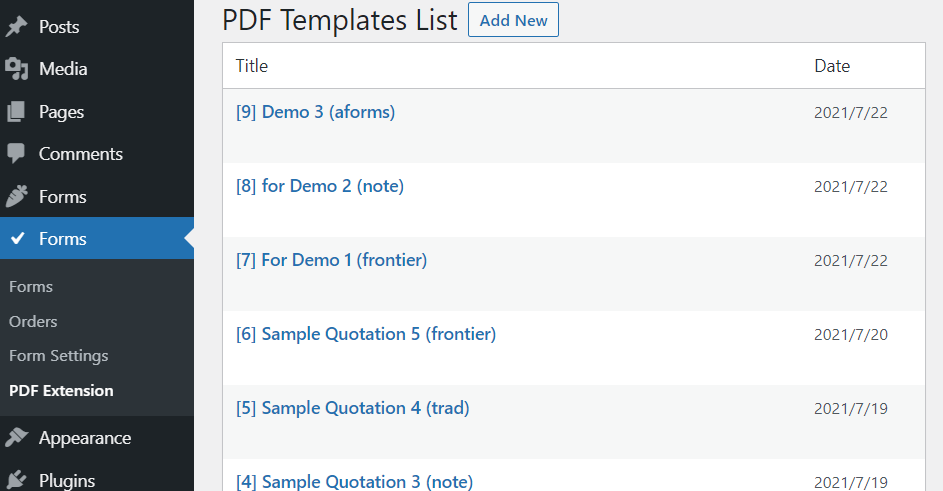
In the “PDF template list” screen, clicking the “Preview” button of each PDF template, you can preview the PDF file.
The preview is complemented with automatically generated data, so it appears as a real quotation.
The criterion for choosing a PDF template should be whether the display items are the same as the ideal quotation. This will make the rest of the process easier.
Display items are things like the customer’s address, the quotation expiration date, and the category of the quotation details.
For example, whether or not to include the customer’s address in the quotation may change the layout of the quotation.
Once you have selected the sample you like, duplicate it.
Instead of editing the original sample, editing the duplicate one will make you less afraid of making mistakes.
To duplicate a PDF template, please click “Duplicate” for each PDF template in the “PDF template list” screen.
Step 2. Customize the quotation settings
After creating the PDF template to be edited, please click on the title to open the editing screen.
There are two tabs in the editing screen. First, let’s start editing from the “General” tab.
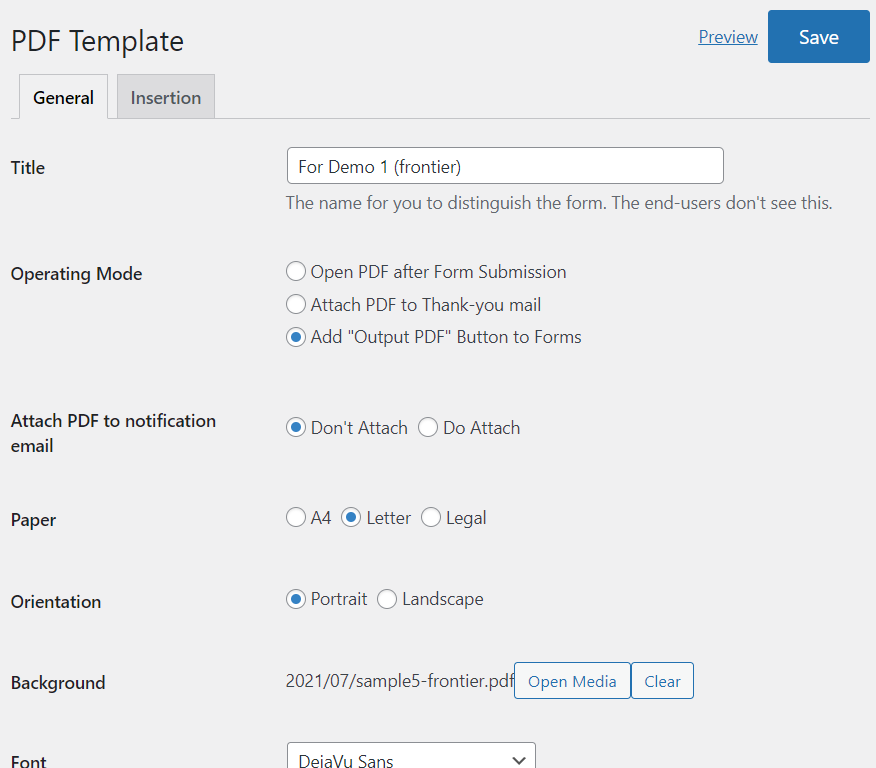
In most cases, you just need to customize the “Title”, “Operating Mode” and “Font”.
The title will not be displayed to the customer, so you can give it a name that is easy for you to understand.
For example, adding “PDF template for form of ???” would be fine.
The operating mode is a setting of when the PDF file will be served while the customer is working with the form.
| Opening a PDF after submitting a form | After the customer submits the form, the download of the PDF file will start at the same time as the “Form submitted” notification appears. Normally, we think that this mode of operation is good. |
| Attaching a PDF to thank-you mail | A thank-you mail will be automatically sent to the customer after submitting the form, and the PDF file will be attached to the mail. The appearance and behavior of the form will not change at all. If you want to focus on reliability, this mode of operation is also good, since quotations are delivered by e-mail. |
| Adding an “Output PDF” button to the form | The “Submit” button on the form will disappear and customers cannot submit the form anymore. Instead, the “Output PDF” button will appear. As customers cannot submit the form, no order data will be stored for site owners. If you think, “I don’t need customer information, I just want my customers to create quotations!” then this is a good choice. |
For the font, it’ s better to choose “DejaVu Sans” if you prefer sans serif fonts, or “DejaVu Serif” if you prefer serif fonts.
Please note that with “Time Roman”, “Helvetica” and “Courier”, the font information is not stored in the PDF file, so there will be differences in the appearance of the text depending on the viewing environment of the file.
After setting the operating mode and font, please click the “Confirm changes” button at the bottom left of the screen to confirm your changes.
Each time you change any setting, it is better to save it and check it in the preview.
Step 3: Customize the contents of the PDF quotation
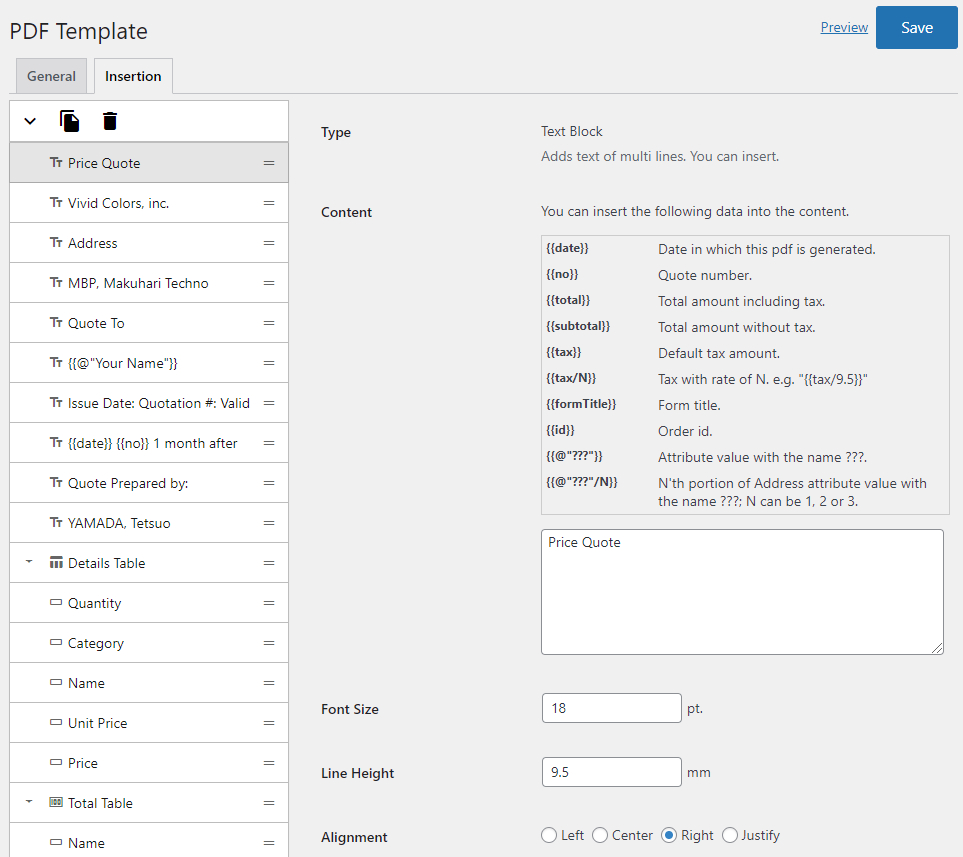
Next, please select the “Insertion” tab. Here, you can customize the contents of the PDF quotation.
The structure of the screen is the same with the AForms form builder.
On the left is a list of components, and on the right is a settings form for the components.
The sample quotation is fairly well done, so this article will only focus on the parts that need to be customized for site owners.
Changing the logo
The quotation contains images such as company’s logos and issuer’s signatures.
In the sample, the image is the logo of Vivid Colors (the author of this plugin) .
So, let’s change it to your company’s.
If you do not need such images, you may delete the component.
In the sample, the logo is a component labeled as “vividcolors_logo.jpg”.
* If you want the background of the image to be transparent, please use GIF images; PNG images cannot be used with this plugin.
Changing the company name or address
The name and address of the issuer should be changed as well as images.
In the sample, the components that are labeled as “Vivid Colors Inc.” are subject to change.
In the same way, you can change the expiration date or terms, etc.
Changing the address insertion
Next, the address of the quotation should be changed.
The address of the quotation is that of the customer. So, this needs to be inserted in with the data entered in the form.
In AFormsPdf, insertion of data entered in a form is performed in the {{@"…"}} format.
In the sample, there should be a component labeled as “{{@”Your Name”}} …”.
Selecting that item, the “Contents” field will contains “{{@”Your Name”}}”.
This means that the text entered in the “Your Name” item (attributes) of the form will be inserted here.
If the name of the item is not “Your Name” but “First Name”, the insertion specification will also be “{{@”First Name”}}”.
Please change this specification point according to the name of the item in the form to be applied.
That’s all you need to do to change the insertions.
In the same way, you can also insert your customer’s address and phone number.
Step 4. Save
The customization of the PDF template is now complete.
Please make sure to save the PDF template with the “Save” button, and preview it to make sure everything is as you like.
Step 5. Applying to the form
Finally, we need to have the PDF template we created linked to the form.
Leaving the AFormsPdf settings, please go to the AForms form list.
After opening the form builder (editing screen) of the form you want to link with the PDF template, a new tab named “Extensions” will appear.
Please select this one.
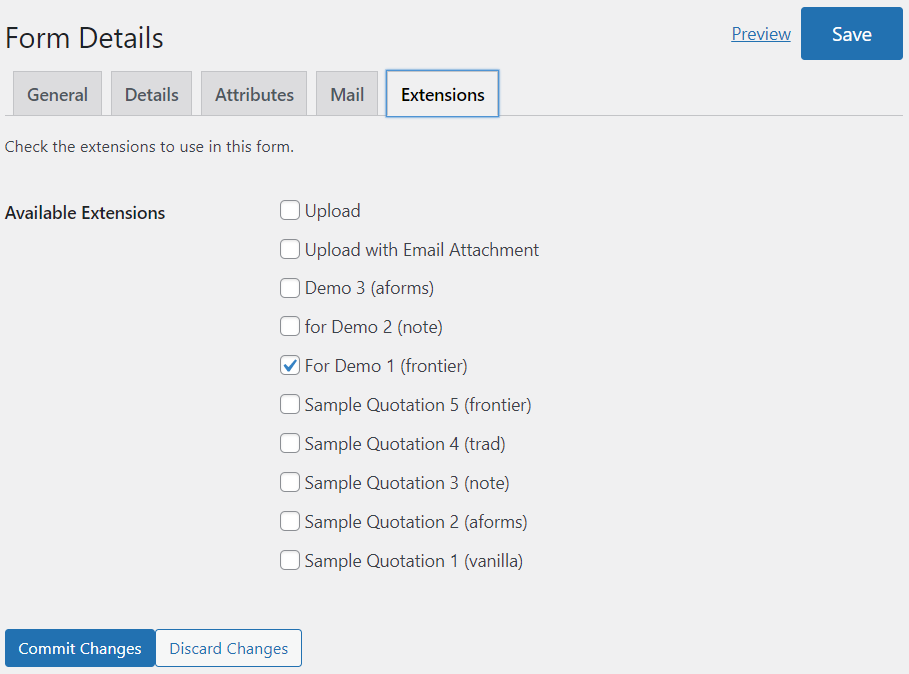
Then, the PDF template you just created will be found in the “Available Extensions”. Please check it, and after confirming the changes, save it.
Now the PDF template has been applied to the form and linked.
Leave the admin panel, open the form page, and make sure everything works as you want it to.
Supplement: How can the site owner view the issued quotations?
If you want to view it in the admin panel, click the “PDF” link or button attached to the order data in the order list to open the PDF.
If you want to view it in the notification email, you can choose to attach the PDF to the notification email in the “General” tab of the PDF template edit screen.
Please note that both of the above two options are not available when the operation mode is “Add “Output PDF” button to the form”.
 en_US
en_US ja
ja